First - I'm sorry to say that some of the advanced features of Curvy were deliberately left out of the demo - and that includes
Image Inflate. So for this particular tutorial you need a more powerful version of Curvy.
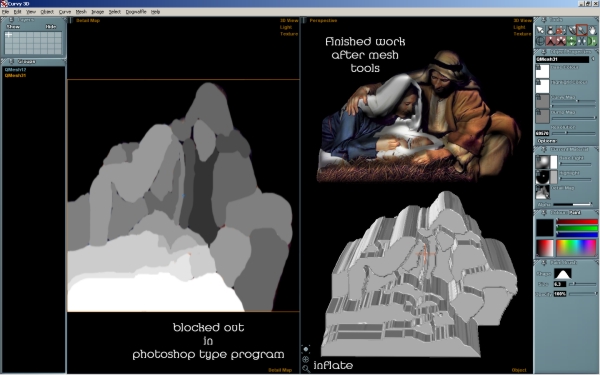
That aside... here is a step by step. You can also see this in action in the
sword inflate video.
1) Make an image and save as BMP
2) Open Curvy
3) Find the "Model" menu along the top
4) Choose "Inflate Image..." from the "Model" menu
5) You will see a box full of options, look at the bottom and find the "Image..." button, click it.
6) Choose your saved BMP from the file dialog
7) Click "OK" at the bottom of the dialog box
8) Curvy will take a short while processing then your mesh will appear
9) Find the Object Properties panel in the top right, and the words "Base Colour". To the left of this there is a white square - this is the base texture for the object.
10) Right click the base texture to choose an image texture
11) Select an image texture from the load dialog. (This can be made to match the greyscale inflate image)